
Quick Start
Quick Start
In this guide, we'll build a simple heating controller that:
- Receives temperature data from a device
- Displays it on a dashboard
- Automatically sends "turn on heater" commands when it gets cold
By the end, you'll understand the core concepts and be ready to build your own project.
1. Create a Project
From the Connect home page, click New Project.
Give it a name (e.g., "Conservatory Heating") and hit create.

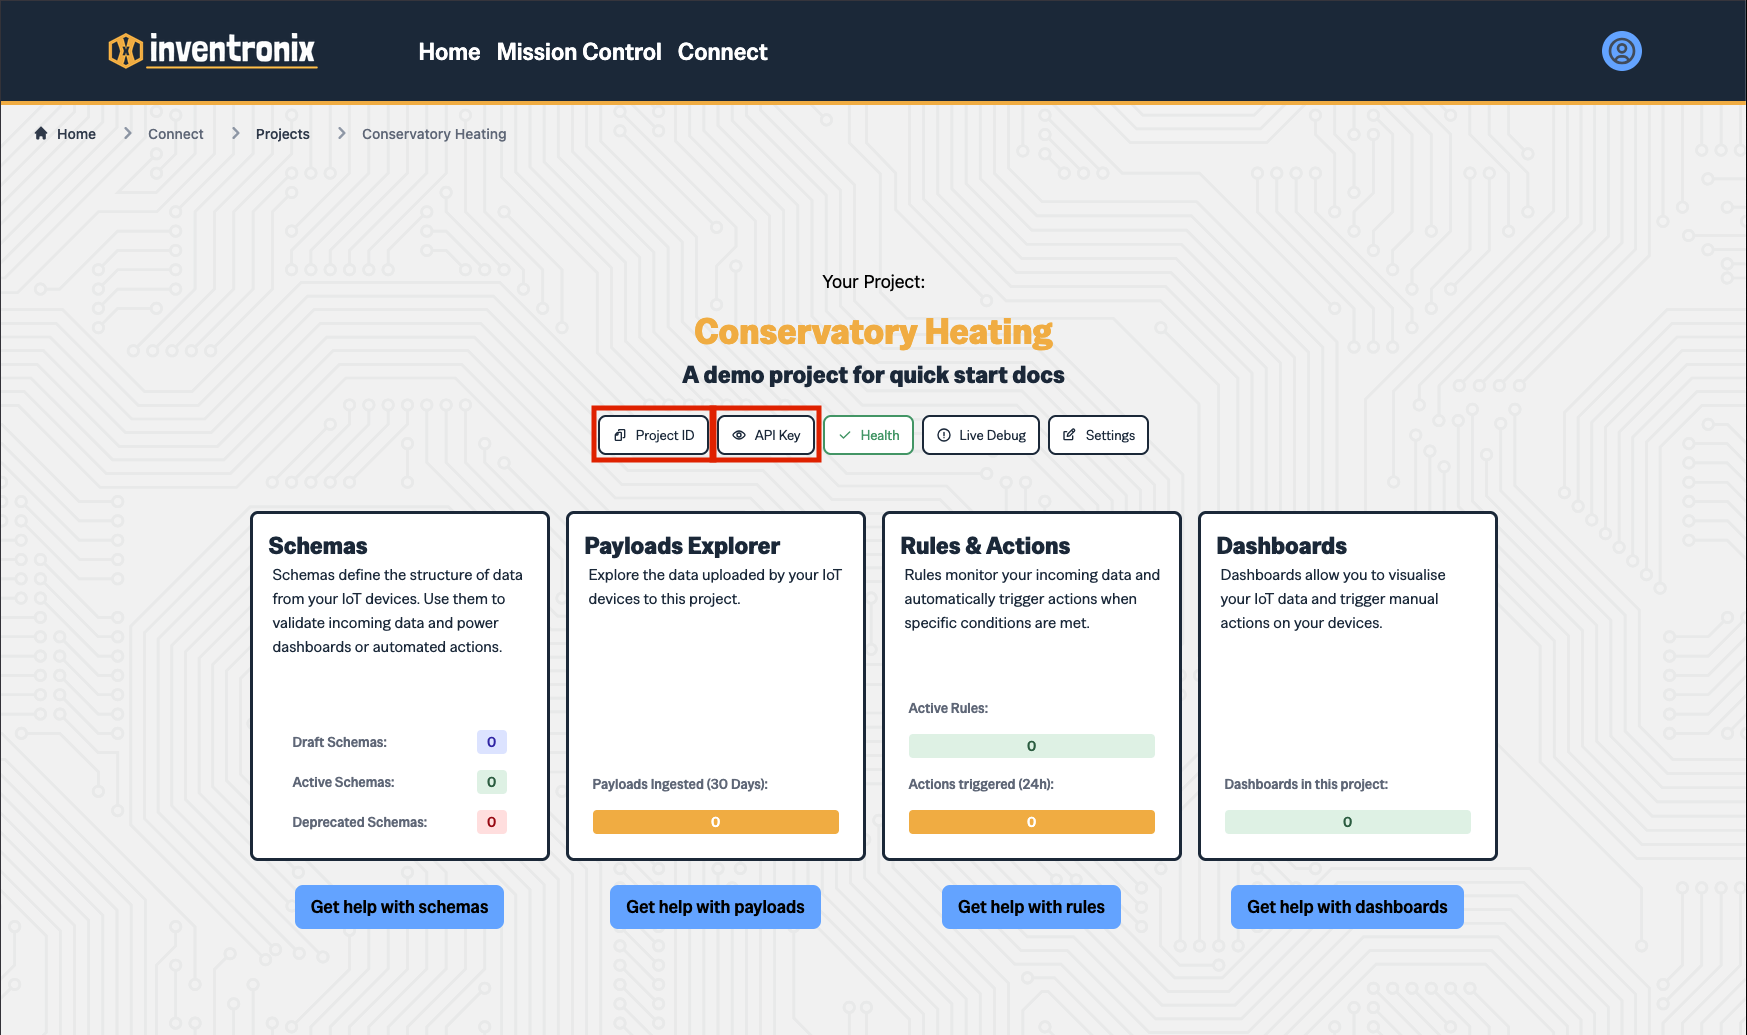
You'll land on your project home page. Note the Project ID and API Key buttons in the toolbar - you'll need these later.
2. Define a Schema
A schema describes the shape of the data your device will send. Click Schemas → New Schema.
For our heating controller, we need three fields:
- temperature (number) - Current temperature in °C
- humidity (number) - Current humidity %
- heater_on (boolean) - Is the heater currently on?
Note: We'll be telling the heater to turn on / off via commands later, but it's always best to send the current state back to the server. This way, you can see what the current state IS rather than what we think it should be.
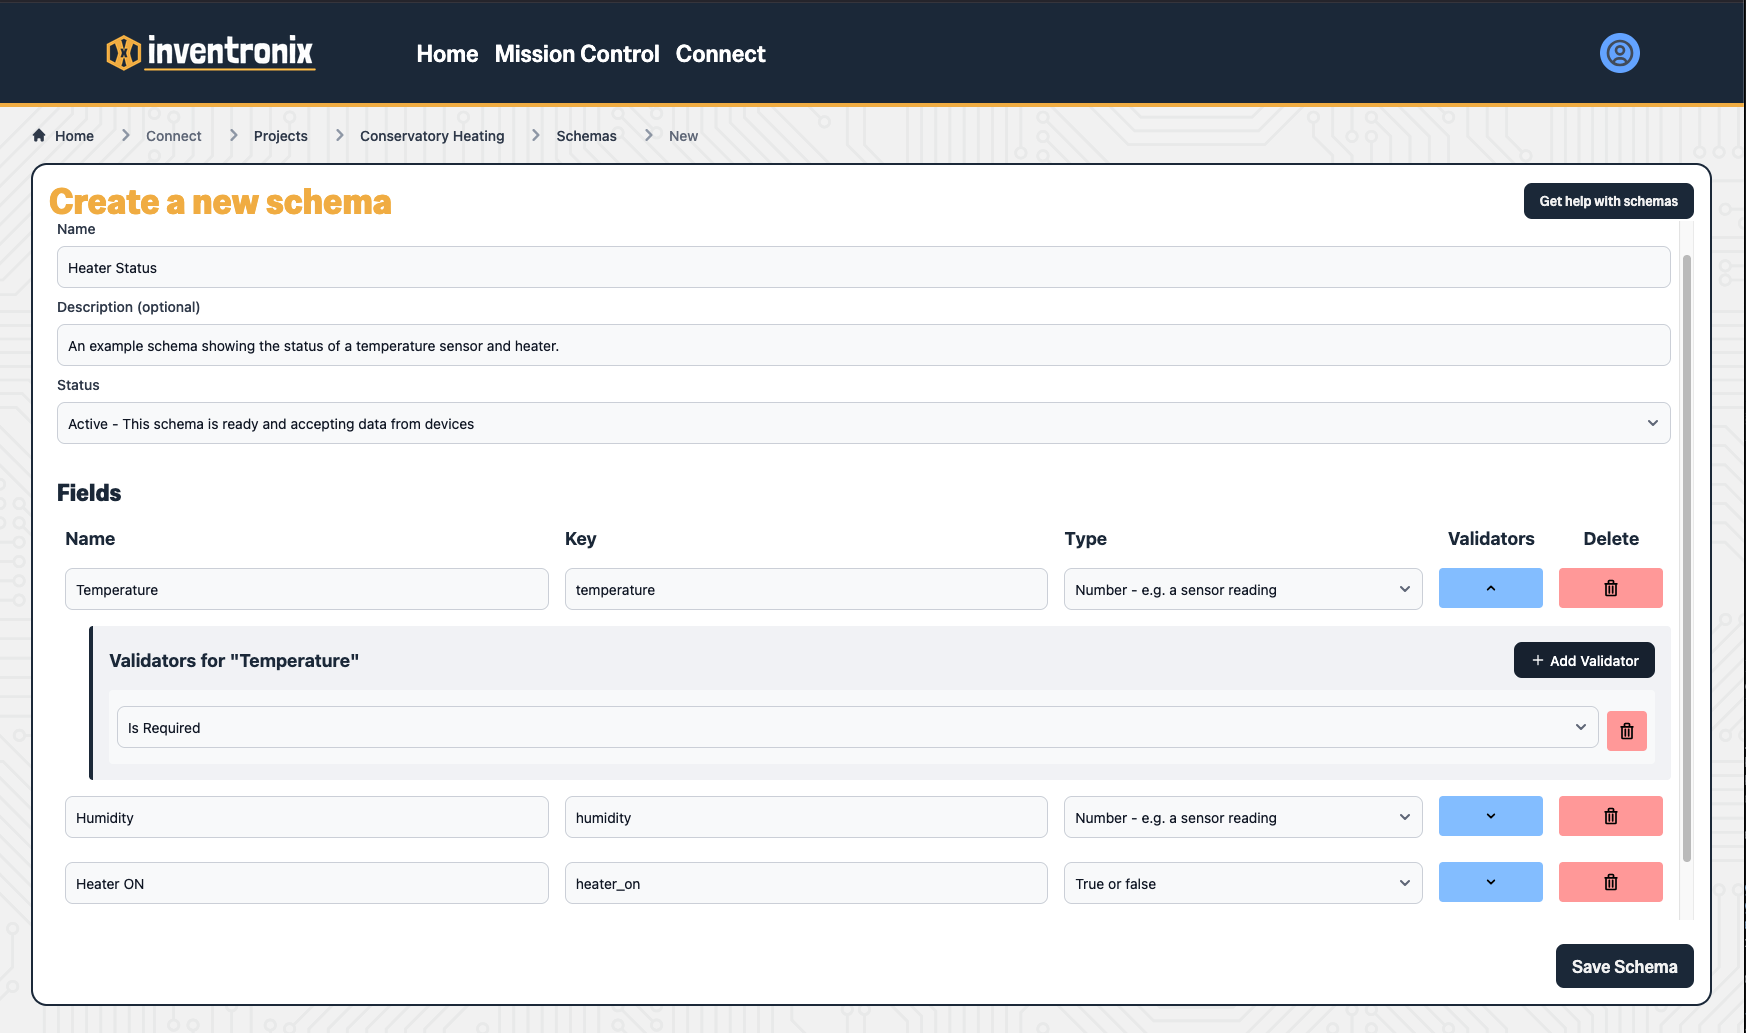
You can add validation to each schema field. This is useful because it makes sure your data is in the right shape and clean before accepting and saving it. For this example we'll simply state that all three fields are required.
Set the lifecycle to Active and save.
3. Send a Test Payload
Before touching any Arduino code, let's prove the API works using curl.
You'll need:
- Your API Key (click the button in the toolbar)
- Your Schema ID (from the schema you just created)
1 | |
When you send a payload to Inventronix, we check all your active schema's in order to find one which matches. If you want to specify which schema to use, you can do this in your request headers.
You should get back:
1 | |
The `commands` array is empty for now - we'll fix that soon.
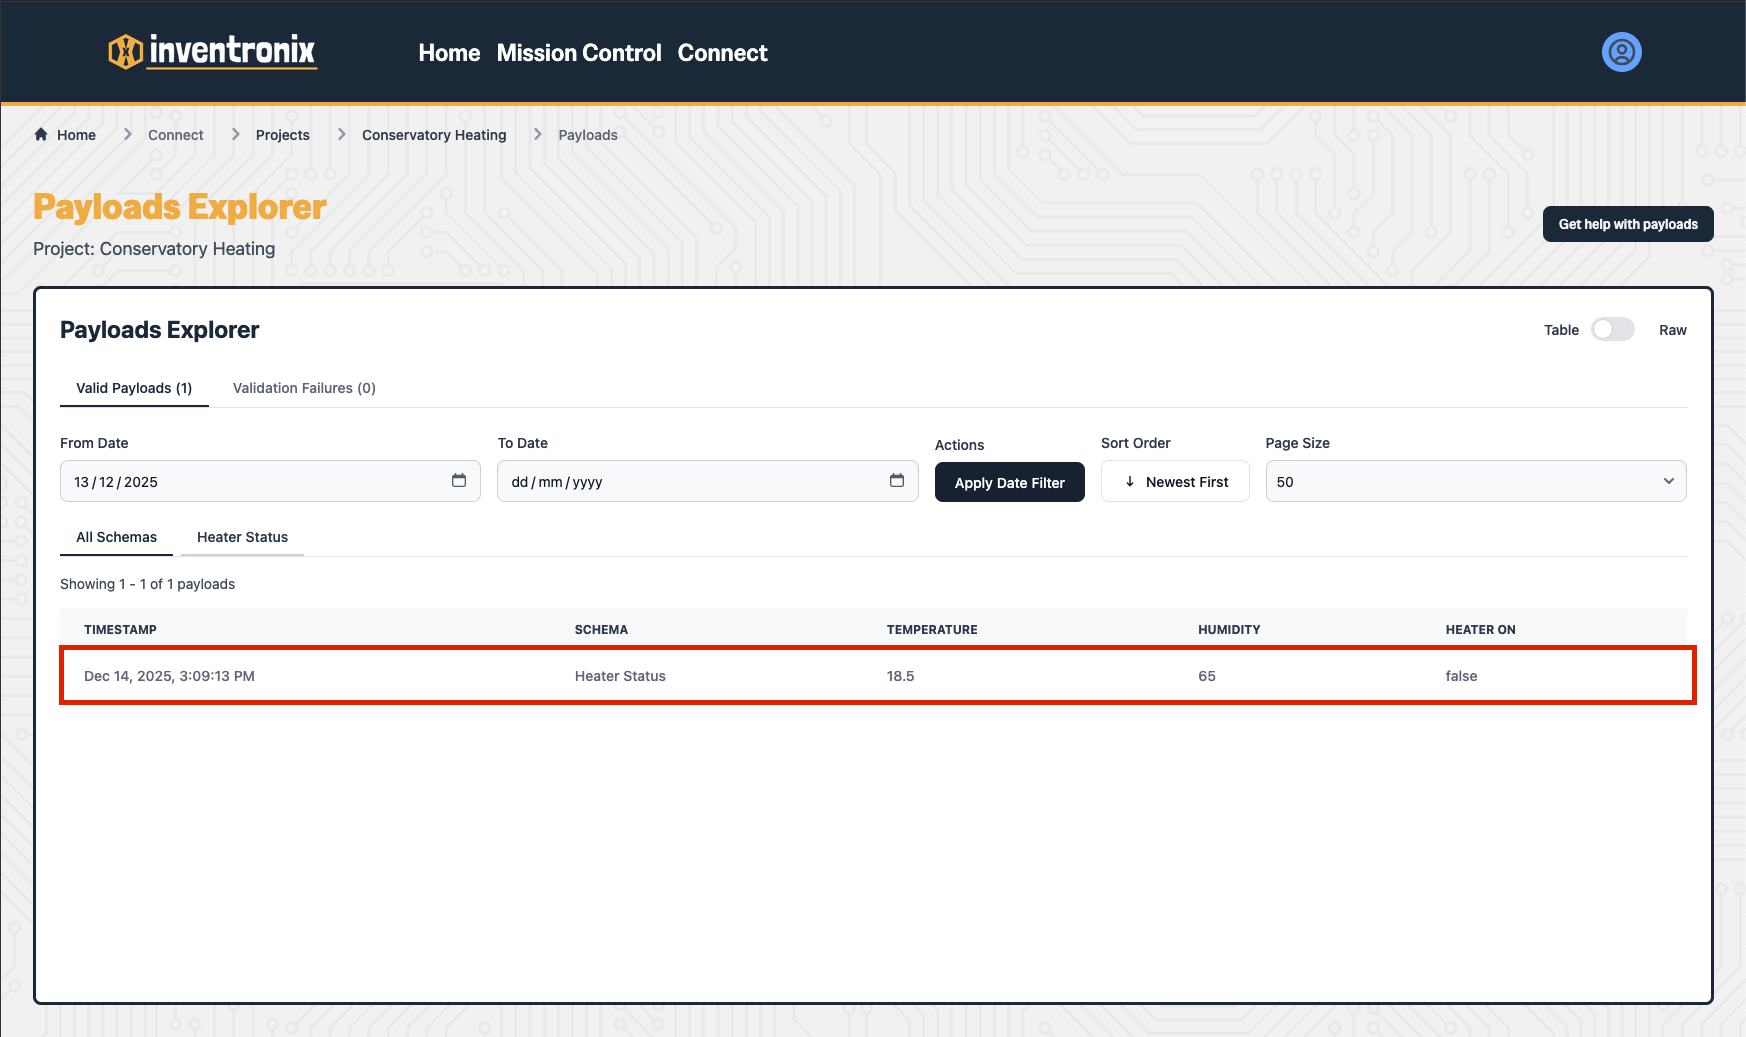
You can view the data you've just sent in the Payload Explorer.
Use the breadcrumbs to go back to your project, then click the Payloads Explorer card.
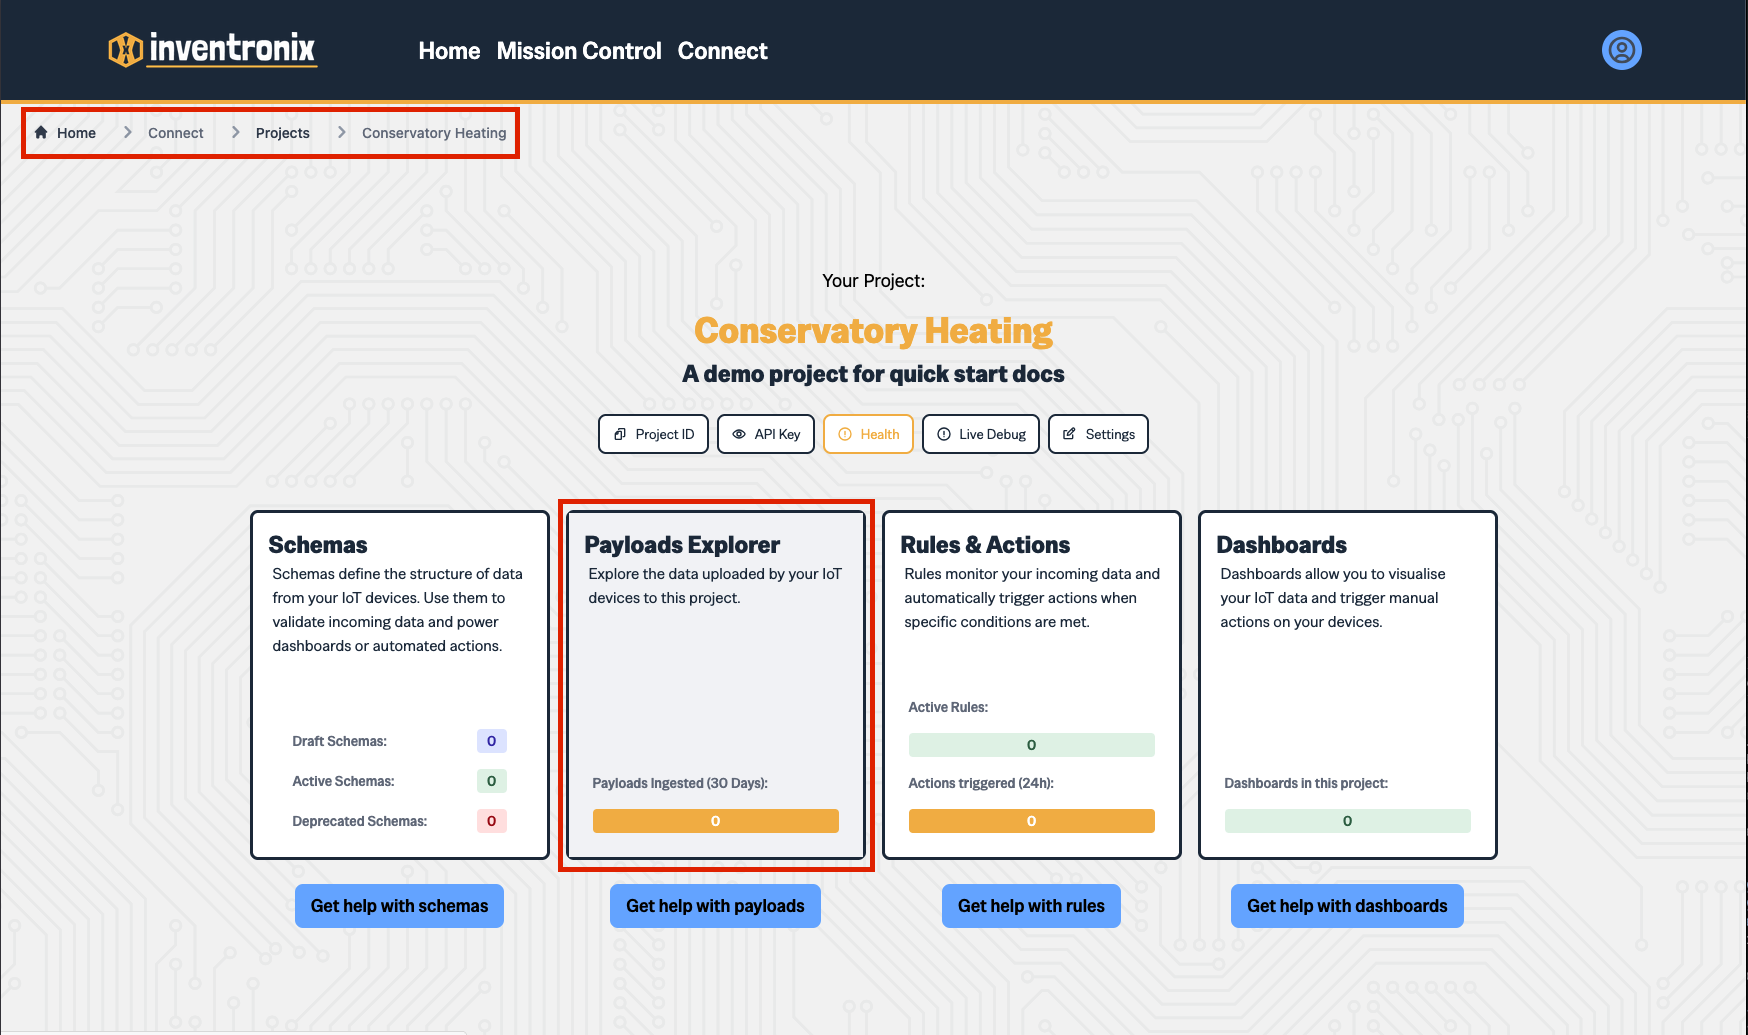
Your payload should be visible in the explorer page.
4. Create a Dashboard
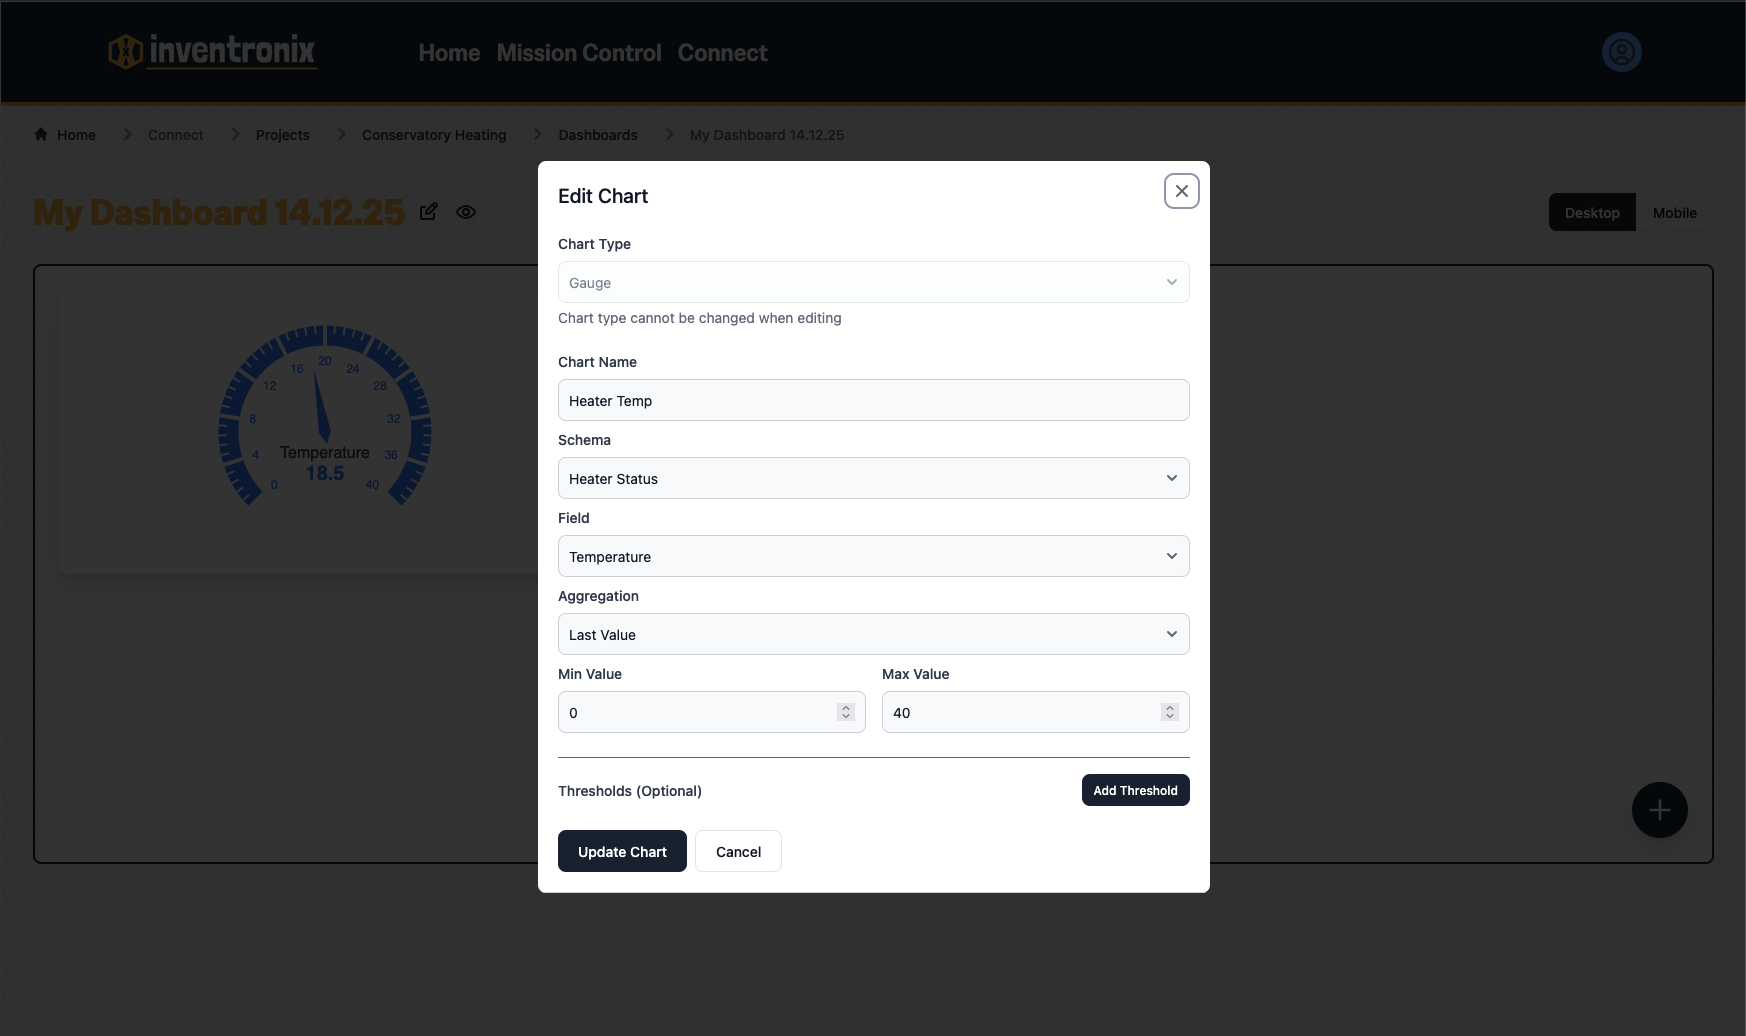
Let's visualise that data. Click Dashboards → New Dashboard.
Add a Gauge chart:
- Source: Heater Status
- Field: temperature
- Aggregation: Last Value
- Min: 0, Max: 40
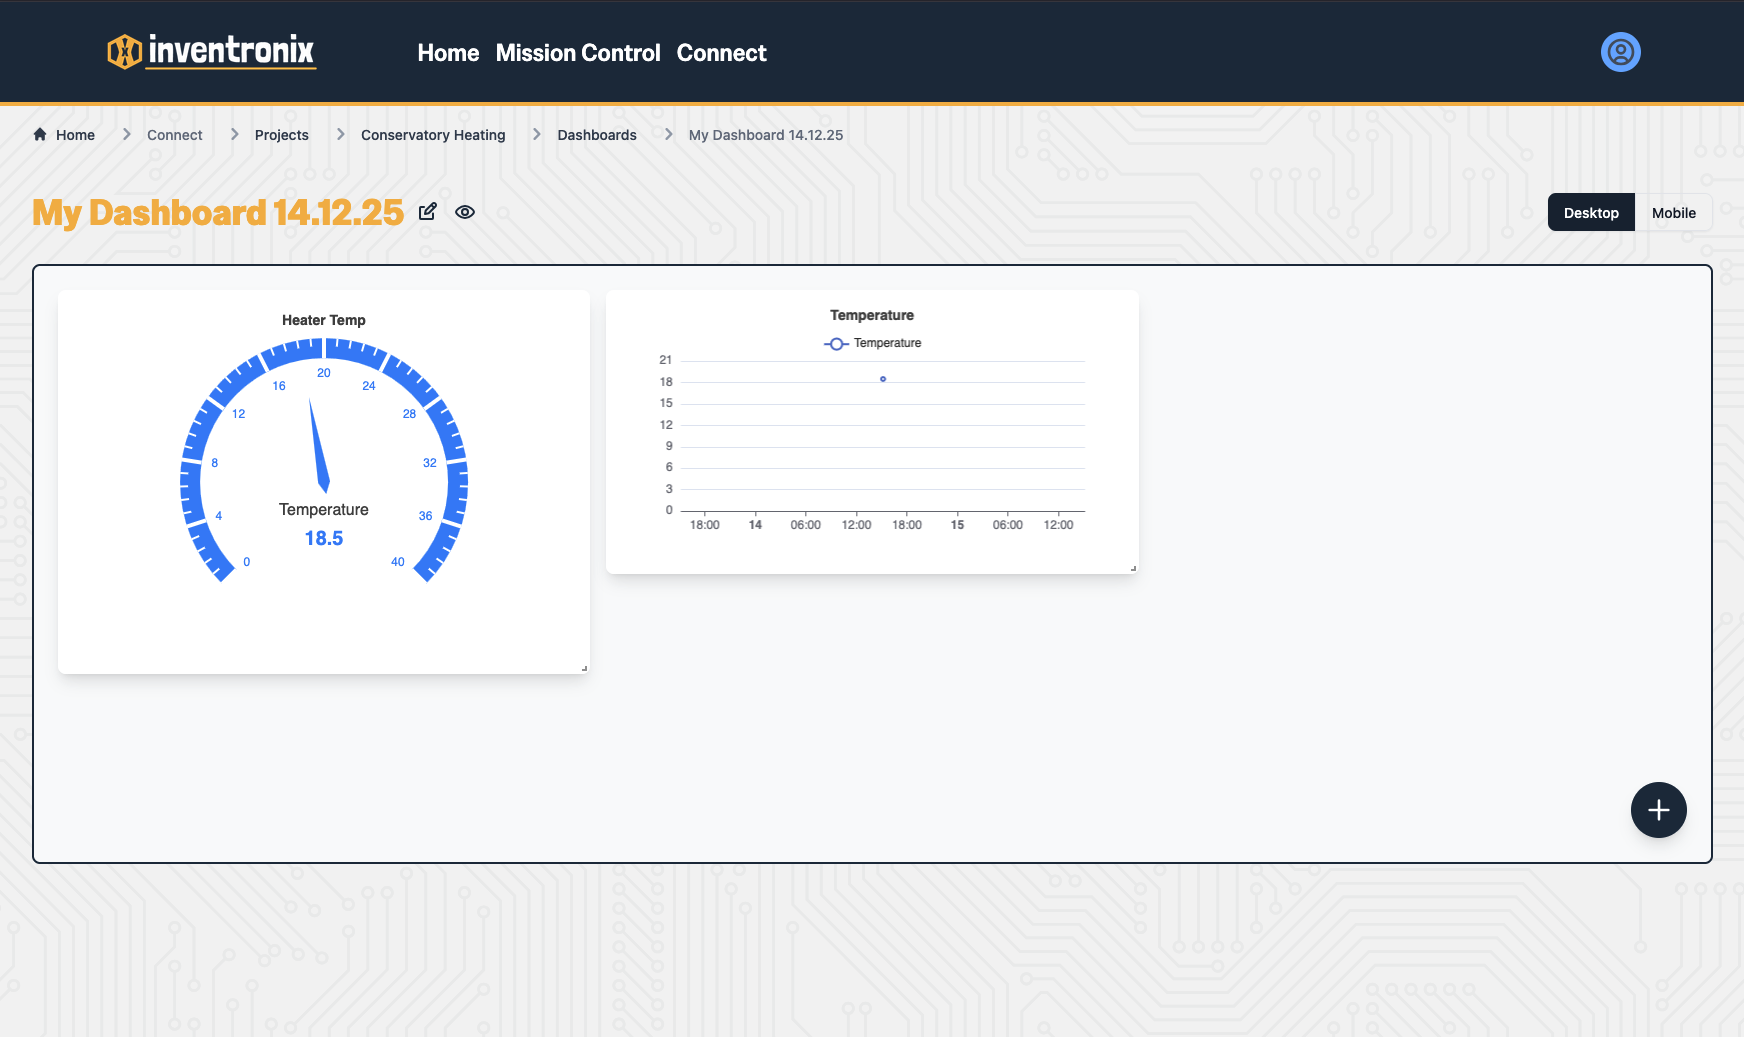
Add a Line Chart for temperature history:
- Source: Heater Status
- Field: temperature
- Aggregation: Average
- Time bucket: 1 minute
- Time Range: 24 hours
This will create a line chart showing one point for the average of all readings per minute for the last 20 hours.
Save the dashboard. Send a few more test payloads with different temperatures and watch the charts update in real-time.
Each dashboard has two layouts, one for desktop and one for mobile. You'll need to configure each seperately. IMO this is better than me guessing how to squash your desktop layout to suit mobile.
While in edit mode, you can:
- Drag chart around to move them.
- Resize charts using the arrow in the bottom right.
- Lock chart movement (helpful when moving other charts around).
- Copy charts to mobile view.
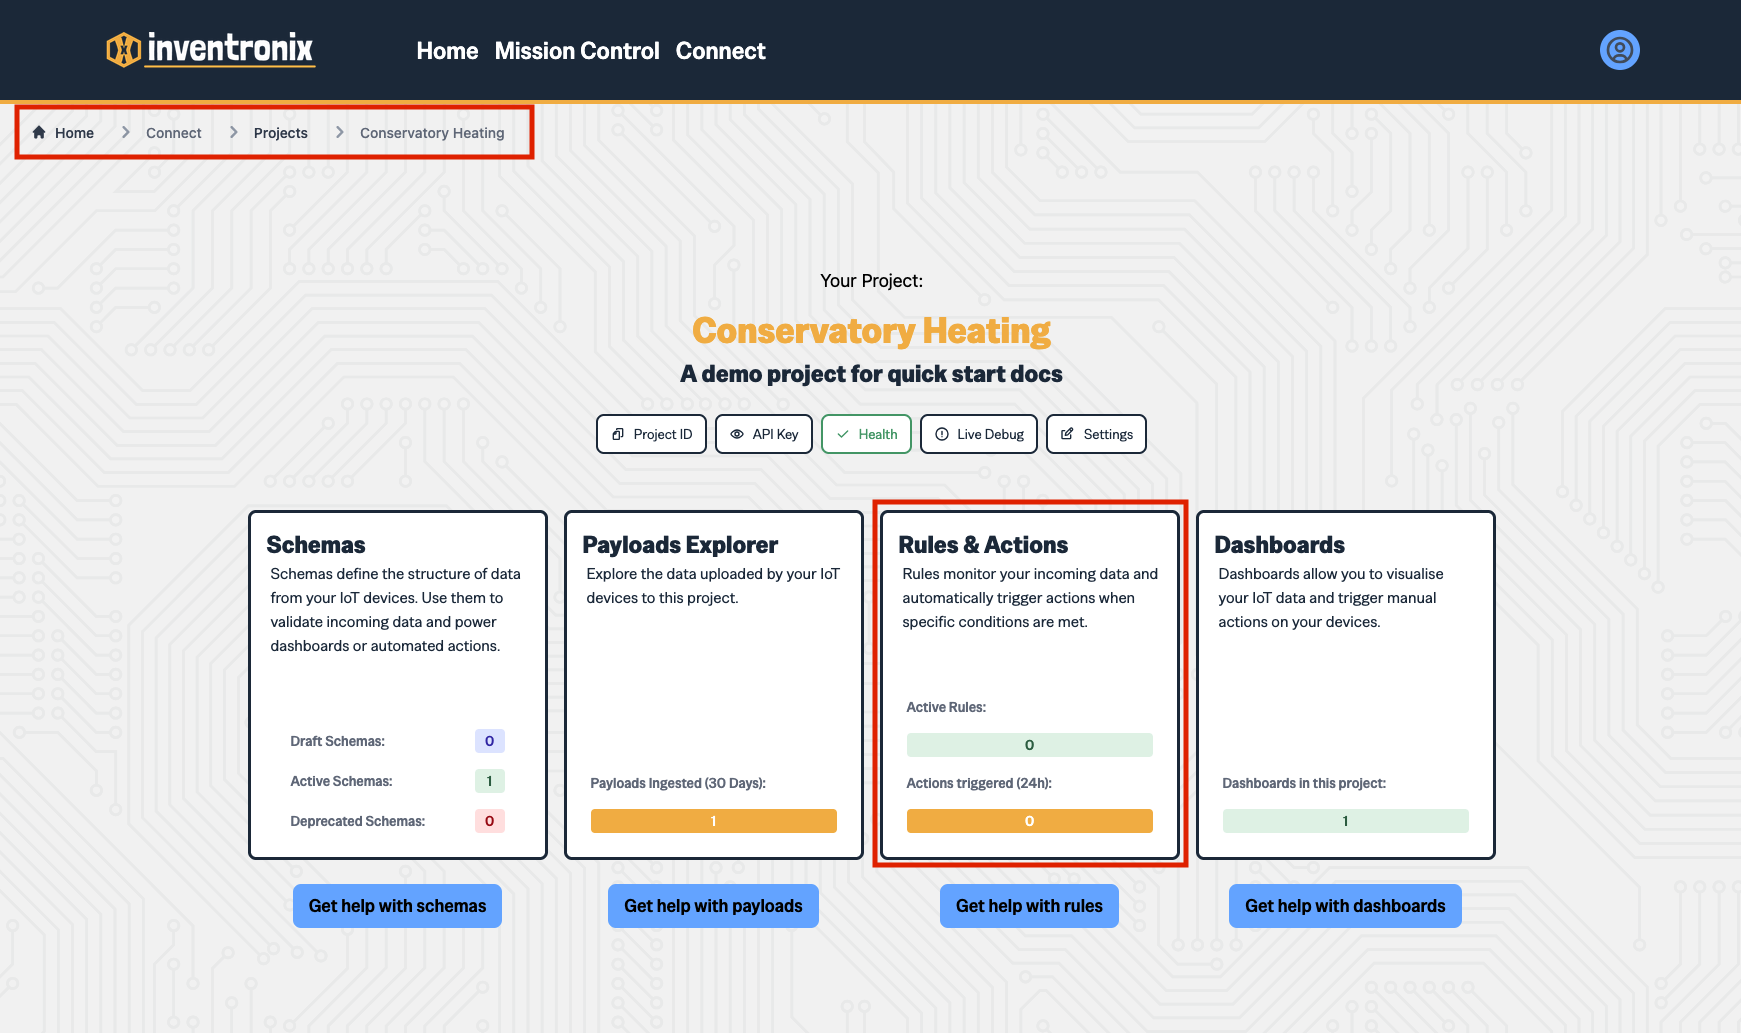
5. Create a Rule and Action
Rules are a series of pre-defined criteria. When these criteria are met, we'll perform an action. For example: When the average temperature in the last 5 minutes is above 20 degrees.
Actions are the tasks we'd like to perform when the rule conditions are met. For example: Send a command to the device or send me an email.
Use the breadbrumbs to move back to the project home screen and select Rules and Actions.
- Select Create Rule to begin creating a new rule.
- For this example, we'll call the rule Turn Heater On
- Add a description to help you identify the rule.
- Press Add a condition.
- Conditions are reactions to data from the device. Select the Heater Status schema you created earlier.
- Select the Temperature field.
- Select last record as the time window for this demo, though you'll likely want an aggregation in future.
- Select Greater Than as the condition and 20 as the value.
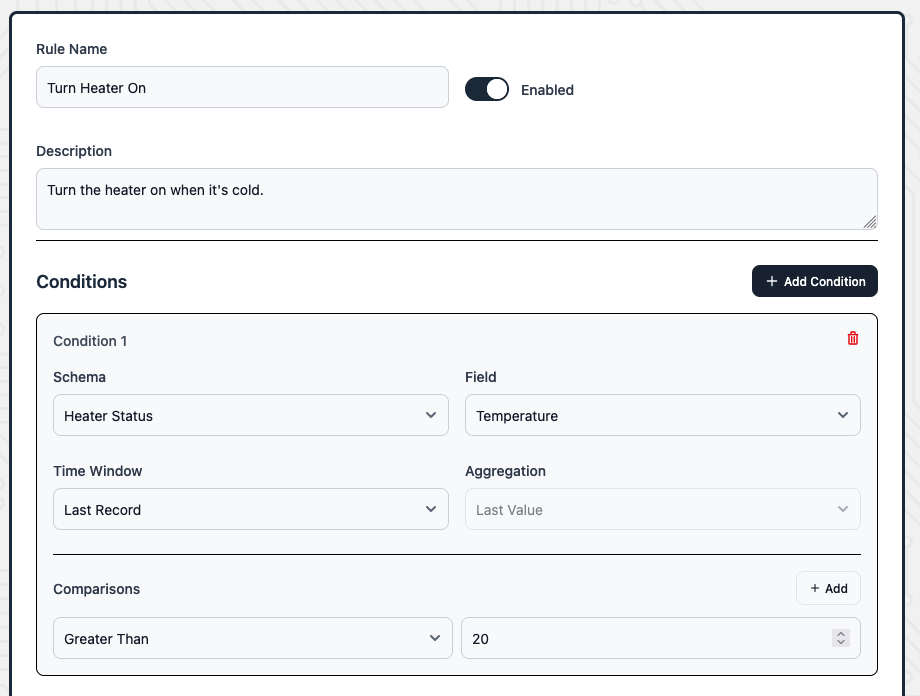
This configures your rule. Essentially we are saying when we receive some new data, check if the last value for temperature is greater than 20. If it is, then _
Next we'll need to configure the action to be performed.
- Press New Action to create a new action.
- For Action Name, we'll use Turn On heater
- Cooldown is the minimum amount of time between actions. This prevents us from sending too many actions in a short period of time. We'll leave it at one minute.
- Add a description.
- For this action, we want to tell the device to do something, so we'll use Device Command.
- Select the Heater Status schema we created earlier.
- For command, we'll use heater_on (this is important for later).
- No arguments required.

Press Create Action then Create Rule to finish.
You'll also need the opposite command to turn the heater off if the temperature is above X degrees, but we've skipped that in this guide for brevity.
6. Test the Rules
Send a cold temperature:
1 | |
YOU WON'T SEE A COMMAND YET. Rule processing is asynchronous. This means that once you send the data, we start processing rules in the background.
Send the same command again.
This time the response includes a command:
1 | |
Your device would read this response and turn on the heater.
7. Program your Arduino / ESP32
For this quick start guide, we'll assume you know how to create and Arduino program and upload it to your device. We'll be using the Arduino IDE for this tutorial.
Next, you can program your Arduino / ESP32 to send data and accept commands.
To make this easy, i've created a simple library in both the Arduino and PlatformIO library registries.
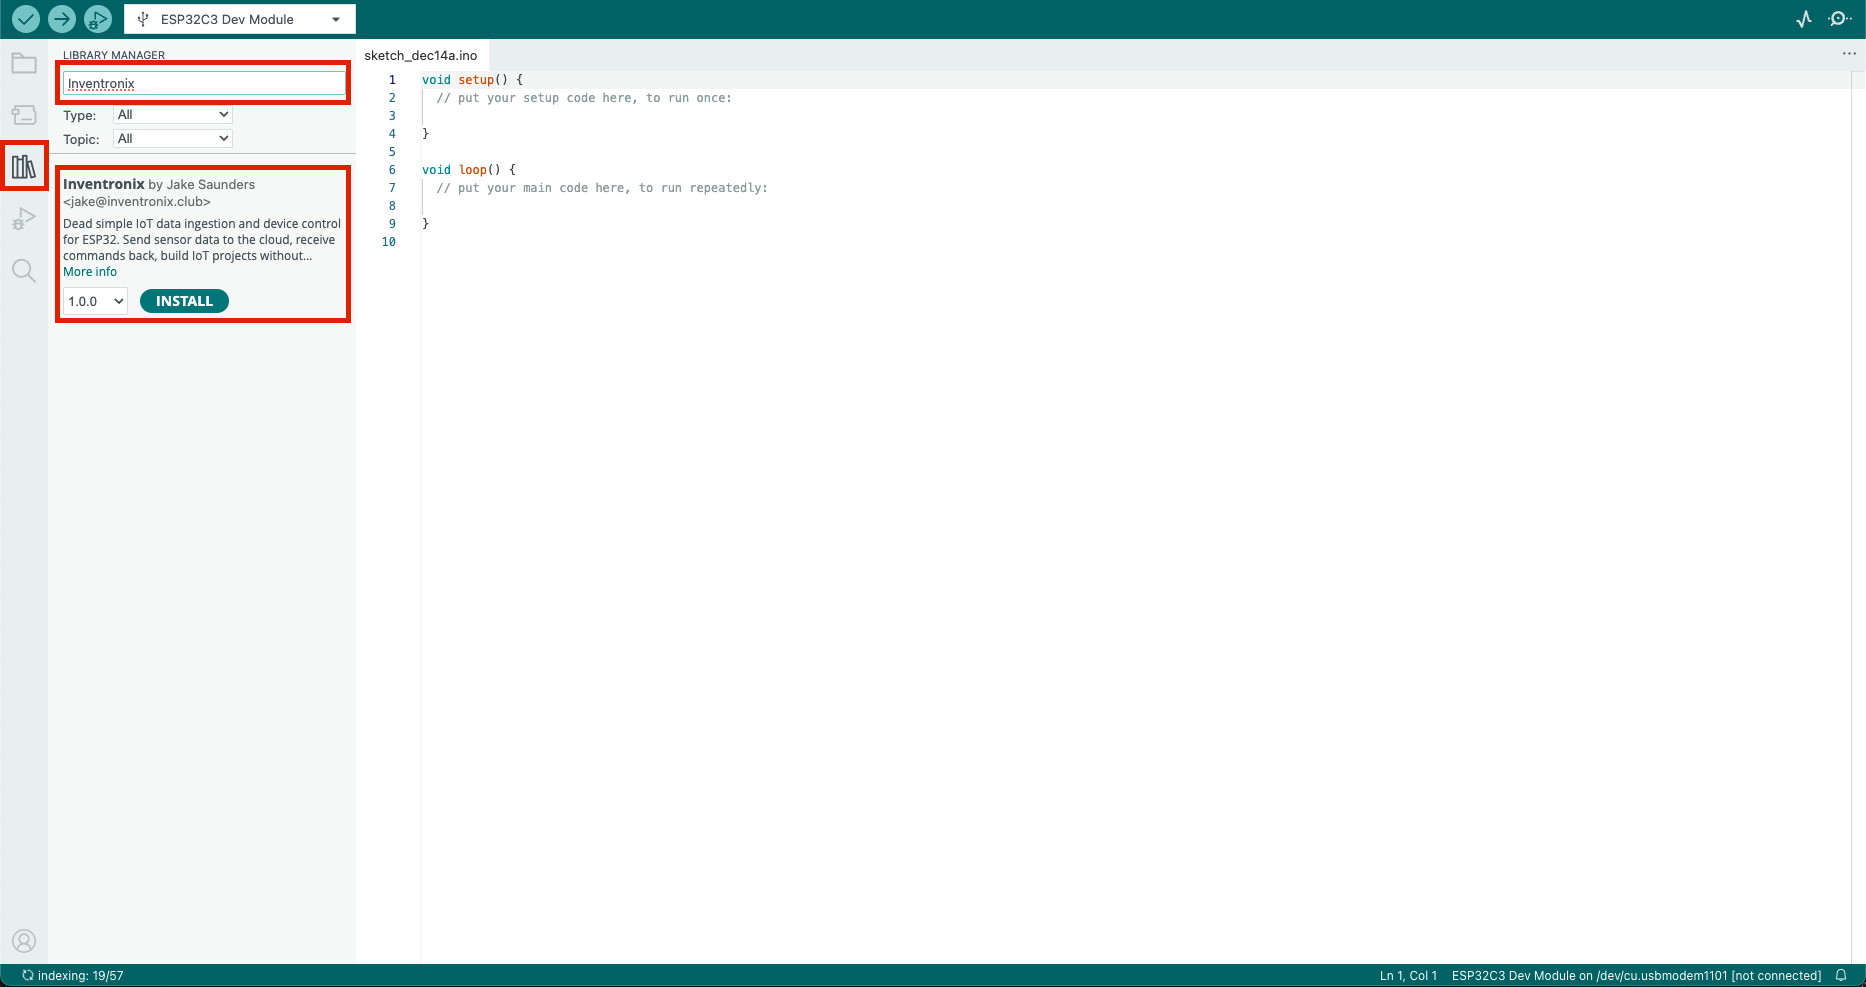
In the Arduino IDE, open the library manager and type Inventronix Press INSTALL to install the library.
Next, create your program. I've created a simple program below designed to use our schema to send data and control a heater.
1 | |
Upload your program to your Arduino / ESP32 and check the serial output!
Next Steps
You've got data flowing, a dashboard, and automated rules. Now:
- Sending Data - Get your actual device sending data with the Arduino library
- Schemas - Add validation rules to your fields
- Dashboards - Explore all 7 chart types
- Rules and Actions - Email notifications, webhooks, and more
- Debugging - Health checks and troubleshooting
Quick Reference
API Endpoint:
1 | |
Required Headers:
1 | |
Payload Format:
1 | |
Response Format:
1 | |